3D nails I feel like this has been one of the biggest nail art Trends over the past year maybe 2 years now so I’m going to show you three easy ways to get 3D nails right at home and I will be using Gan nail polish for all of these examples so we’re just going to get right into it for the first example you’re just going to apply your gel polish like you normally would so start with your base coat apply your gel color and then finish by applying your top coat and curing your nails and that brings us to the first method I’m going
to be using the daily charms STP put no white gel and I will say this one is a little bit pricier but compared to others that I’ve used I just I really love this one mainly because it has that really fine tip so it makes it so easy to draw designs on your nails and it’s not too thick so you want it to be thick so that it gives you that 3D look but some of the ones that I’ve tried they’re so thick to where you can’t move them around if that makes sense so basically what you’re going to do is take the
bottle and just squeeze and start drawing your design it’s really easy to work with I’m making kind of random blobs here and like I mentioned the consistency of this gel isn’t too stiff so you can go back in and kind of fix the shapes or lines that you’re drawing and that’s what I end up doing so I’m going to take a small brush and just kind of go over some of the areas where I want it to be a little longer or rounding out corners a little bit just things like that and then once you’re happy with it you’re going to cure your
nail and that is it because this gel has a no wipe finish you don’t have to worry about applying a top coat or anything once you cure your nail you’re done and I did end up adding another blob just because but I will say if you’re a beginner or you’re just now trying out 3D nail art this is the best way to start just do a solid background draw a design cure it and then you’re done now if you’re a little bit more advanced or you’re just ready to move on to that next step then instead of that solid
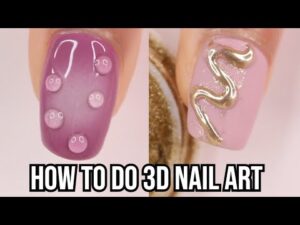
background you’re going to start with a design of your choice so here I’m starting off with an aura ombre background you could do a fringe tip you could do really any design you want as your base and then you’re going to cure it like normal and then apply your top coat so we are still using the same method here it’s just going to look more intricate because you already have that background Design After curing that top coat I’m going to grab the stay put gel again and this time I’m making dots and
I really wanted to make sure they didn’t move so this gel will be wet until you go to cure it so instead of waiting until I did the entire design I’m going to just do two dots and then go ahead and cure my nails so this will vary based on what gel you’re using because like I said some are going to be more stiff so they won’t move at all some more runny so you may have to cure as you go you really just have to kind of play around with it to see what works best for you but for me if you’re not sure just go ahead and cure it and then
keep drawing your design here’s how that look turned out isn’t that so fun I like this is so cute you could do so much with it if you want to use this method to do 3D Chrome nail art then here’s how the main difference here instead of using a glossy top coat you’re going to start by applying a matte top coat and curing your nail and then you’re going to grab the stay put gel again and go ahead and draw your design I went with squiggly wavy line in the top corner of my nail and once you’re done drawing
your design you can go over any areas or fix anything that you need to with a small brush and then go ahead and cure your nails so usually when I’m going to use Chrome I am really careful with not over curing my nail but with this because it’s so thick it’s hard to accidentally overcure it at least I haven’t run into any issues with that so after curing I’m going to rub on the Chrome powder and I’m using a silicone tool and gold chrome to do this you can also use an ey Shadow applicator I’ll have everything I’m using a linked down
below for you guys but I’m just going to take it rub it on make sure you get the sides too since it is raised off of the nail and this is always so satisfying I love doing this I love Chrome designs I really do so I’m just going to buff that on and then I do like to take an ey Shadow applicator and just get rid of some of the extra pigment from my nail just to make it easier for the next step this is optional but I do feel like it makes my Chrome look better after that you need to seal in the Chrome so I’m
taking a brush and and gel top coat and I’m just going over that Chrome area trying my best to stay only on the Chrome if you get a little bit on your nail it’ll be okay but I am trying to be as careful as I can and then once I’ve covered that entire Chrome area I’m going to cure my nails underneath my lamp and as you can see it leaves you with a 3D Chrome design method number two again you’re going to start off with your gel polish color of choice and then you’re going to grab a matte top coat
apply that and cure your nails this technique is another fun one this is best if you’re looking for something more subtle and monochromatic but you still want that 3d effect so what you’re going to do you’re going to be taking that same base color that you used and you’re going to apply it to some kind of surface I like to use a piece of plastic you can also use one of those little nail polish paint palettes and then I’m going to take some clear acrylic powder this one is from vbd and this is technically optional right here but I’m
going to be mixing a little bit of the clear powder with the gel polish and that’s why I said it’s optional so you can just use the gel polish as it is especially if it has a thicker consistency but what this is going to do is make it even thicker and I like to work with that better because then I don’t have to worry about it moving around and it just gives me more time to create my design so you can make it however thin or thick you’d want and also the thicker it is the more of that 3d effect you’re going to get so once I
have my gel mixed together I’m going to use a brush and then start drawing my design right onto my nail I’m just doing some kind of curved lines in each corner you can really draw whatever here I’ll show you guys some examples of what I’ve done with this technique and some of you probably already know this but this is the same technique that you use when you’re doing sweater nails but like I said you don’t have to limit it to that design you can do so many things with this and you do want to take your time
because whatever your lines or shapes or whatever you draw on your nail look like that’s what the final look is going to be so I take my time and then as soon as I’m done I’m going to take some more clear acrylic powder and sprinkle that on my nail I say sprinkle but I’m definitely just kind of dumping it on my nail because you want to make sure the entire design is completely covered so I’ll pour a whole pile I always make sure I’m using a paper towel or a piece of paper underneath so that I can just
scoop it back into the Container because I have I’ve had this container at least 5 years probably longer I’m pretty sure this whole brand rebranded during the time I’ve had this jar so it will last you if you get it just for this technique but anyways as soon as you’re done pouring that powder on you’re going to carry your nails under your lamp and this is going to make everything stick to that design and then after and only after you’re done curing you can take a brush and just wipe away all of that
excess powder and then after I do that sometimes I’ll also take an empty makeup sponge and just wipe off my nail even more and that is it this is literally I don’t know if you guys remember but back in arts and craft days when you would take glue liquid glue and put it on paper and then sprinkle glitter or something on it and then wipe it off this is that just on your nail and here are just a few ways I’ve used this method in the past just to give you guys some ideas some inso moving on to the next method I feel
like this one can be overlooked even though this is the easiest way to give your nail art a 3D look and that’s adding gems charms pearls really just sticking stuff on your nails so there are a few ways to do this the first method is to just use the top coat so here I’m applying the gel top coat and before curing I’m going to add the gems now if you are someone who is rough on their nails if you just do a lot with your hands I would not do this method because it’s not going to hold the gems as well as other ways of
attaching them but if you’re more gentle or you just want a quicker method this could be a good one I will say to a downside the gems will move around while you’re doing this so that can I mean I guess that could kind of be good if you want to move and place things as you go but it can be annoying having things wiggle around when you’re placing them so pros and cons but this is a way to do it you can always try it out and see if you like it and then once you’re happy with where things are you can go ahead
and C your nails underneath your lamp so that’s one method if you want more hold you can use a jewelry gel which brings me back to the stay put I love a product that’s multi-use I’m not working with them or anything but you really can do a lot with this product I know mcart also has a rhinestone glue that I’ve heard good things about so either one you can place it where you want the gems to be and then you’re going to place your gem and then you’re going to cry your nails so that’s kind of that method it gives
you a stronger Hold You could also use a nail glue if you’re using regular nail polish or if you’re using gel you can just use a regular nail glue with that one you would just wait for it to dry completely I was just really doing random designs throughout this video for each method but they were turning out cute like I love this the caviar beads around the pink gems I feel like that could be a cute nail look once you’re at this point there is one more optional step and you know who you are but if
you’re somebody who needs an extra layer of protection or you’re just rough on your nails in general then I would apply a top coat over your gems to really seal everything in now I personally don’t like to do this just because it will Dole your gems a little bit and I just like to have them as shiny as possible so again it is optional I will leave that up to you guys but that is the final method there are so many other ways to get 3D nails but these are just go to three easy options if you’re new
to it I hope this helped you guys out and I will talk to you my next video bye